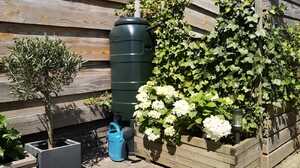
How to Install a Water Butt: A Step-by-Step Guide
In a world where sustainable living is gaining increasing importance, conserving water has become a primary focus for environmentally-conscious individuals. One effective method to achieve this is by installing a water butt. These simple and cost-effective devices allow you to collect rainwater, which can then be utilised for various purposes such as watering plants, washing cars, and cleaning outdoor spaces. In this step-by-step guide, we’ll take you through the process of installing a water butt and reaping the benefits of this eco-friendly solution.
Step 1: Gather Your Supplies
Before you begin the installation, ensure you have all the necessary supplies ready:
- Water butt
- Stand or platform (if needed)
- Diverter kit or rainwater harvesting system
- Downpipe connector and filter
- Hose or tap kit (optional)
- Sealant tape
- Screws and wall plugs (if wall-mounting)
- Spirit level
- Tools (drill, screwdriver, saw, etc.)
Step 2: Choose a Suitable Location
Selecting the right spot for your water butt is essential. Look for a location that:
- Receives a good amount of rainfall.
- Is near a downpipe from your roof to collect rainwater.
- Is level and stable to prevent tipping.
- Is accessible for watering cans or hose attachments.
- Allows for easy maintenance and cleaning.
Step 3: Prepare the Downpipe
To divert rainwater into the water butt, you’ll need to modify your downpipe. Follow these steps:
- Measure and mark a height on the downpipe where you want to install the diverter. Usually, this is a few inches above the water butt’s inlet.
- Cut the downpipe using a saw or pipe cutter at the marked height.
- Attach the downpipe connector and filter to the cut end of the downpipe using sealant tape and screws. The filter will help prevent debris from entering the water butt.
Step 4: Install the Water Butt
Depending on the type of water butt you have, you might need to place it on a stand or platform. This elevation helps in accessing the tap at the bottom. If the water butt has a flat back, you can mount it against a wall using screws and wall plugs.
Step 5: Connect the Diverter
Install the rainwater diverter kit or rainwater harvesting system according to the manufacturer’s instructions. Typically, this involves attaching a hose from the diverter to the inlet on the water butt.
Step 6: Check for Leaks
Turn on the water supply to your downpipe and check for any leaks around the diverter, connectors, or water butt. Make sure all seals are tight and secure.
Step 7: Optional Accessories
If you want to access the collected rainwater more conveniently, consider attaching a hose or tap kit to the water butt’s outlet. This will allow you to fill watering cans or connect a hose for various outdoor tasks.
Step 8: Regular Maintenance
To keep your water butt functioning effectively, perform regular maintenance. Clean the filter and the water butt’s interior to prevent the buildup of dirt and algae. During the colder months, you might need to empty and store your water butt to prevent freezing.
By following these simple steps, you can successfully install a water butt and contribute to water conservation efforts while simultaneously reducing your water bills. It’s a small step that makes a significant impact on the environment and your wallet.
Posted by Luke Clark on August 24th 2023
